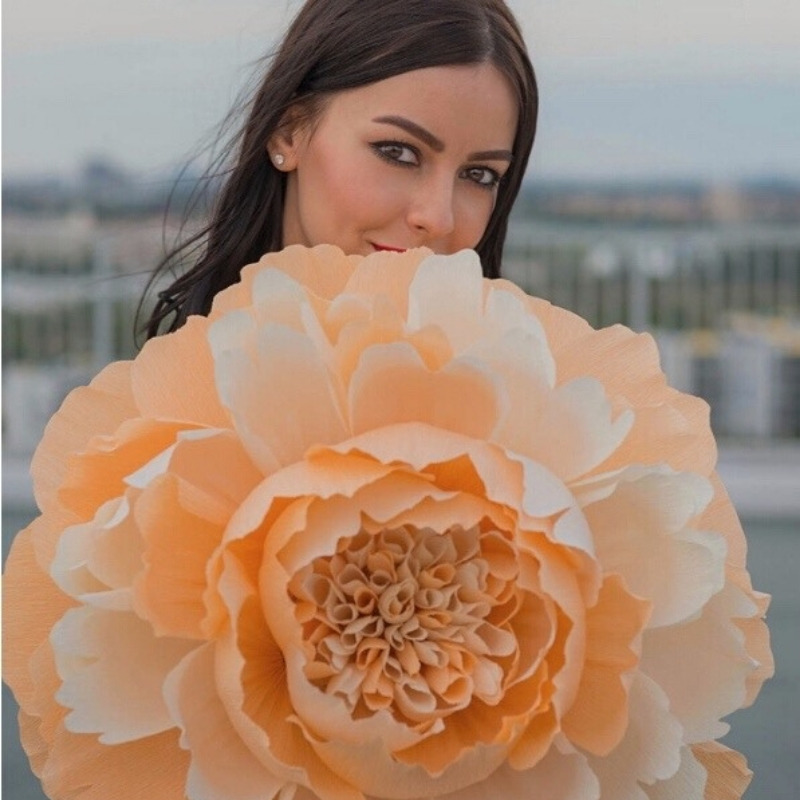
Dahlia is such a beautiful flower. And there is a huge variety of all kinds of dahlias in nature.
But if you make a search for something like “paper dahlia” or “diy dahlia flower”, chances are you’ll just find a bunch of very similar tutorials where you have to cut many identical paper squares, then curl them and glue them together.
And while I have nothing against those lessons and flowers, I just wanna teach you something a little bit different.
We will make the paper dahlia look more realistic because of the right petal’s shape but we will save time by reducing the number of petals. So it will be everything as I like – beautiful and simple!
And yes, I’ve prepared free templates for you that you can
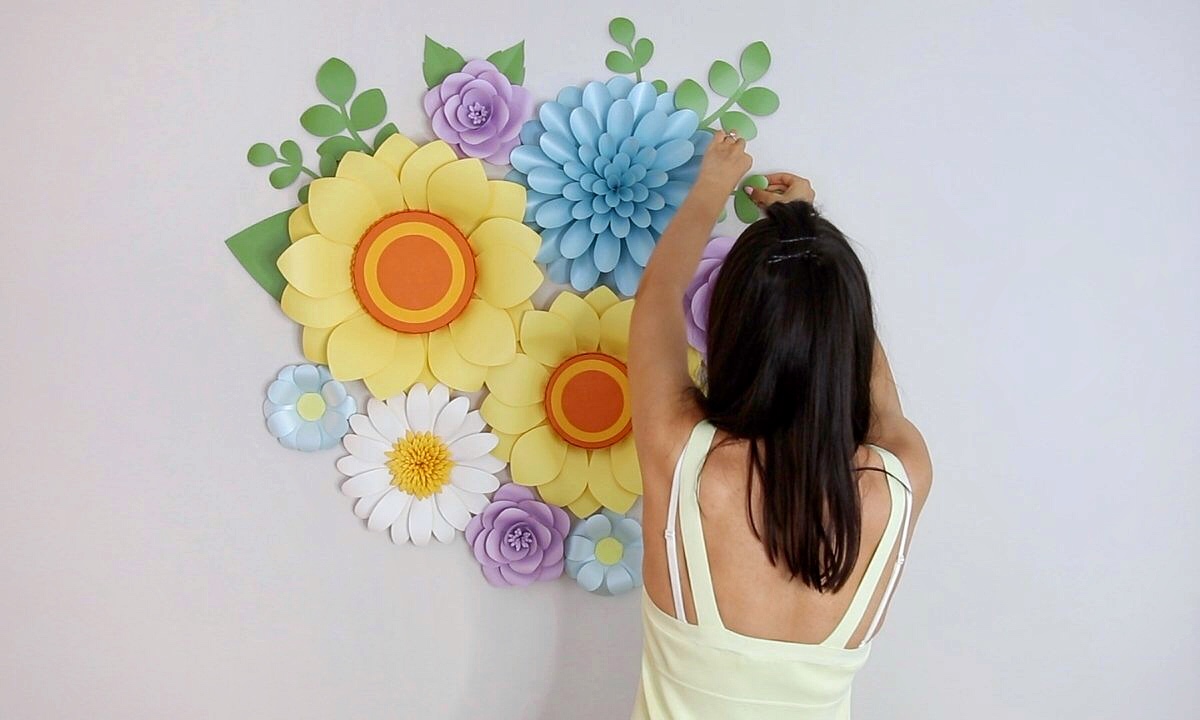
Also this free paper Dahlia tutorial is part of my new product called “Paper Flower Backdrop DIY Kit”. This is a templates kit for 5 different paper flowers plus templates for leaves with my detailed video tutorials, so you can easily make your own paper flower backdrop really fast. So make sure to check it out!
 2")
Ok, let’s start to make it!
I cut all the petals with my cutting machine, but even if you don’t have one, don’t worry, you can easily cut them by hand. Because the shapes of these petals are extremely simple, so the cutting machine is completely optional here.
By the way, very often I get questions about what type of cutting machine I use, so I will answer here. I love my ScanNCut from Brother, because it also has a built-in scanner and I love the quality of this machine, so I can definitely recommend it!
 3")
Let’s start by preparing the base. We need 2 pieces – the large one and the small one. And I like to line-mark both of them with a pencil into equal parts.
 4")
And then I glue the small base on top of the large base, making sure that all the lines match.
 5")
I think this step is especially important when making a dahlia flower, because if you skip it and glue all the petals just by eye, the result can easily be a crooked and asymmetrical flower, and trust me, you don’t want that.
It’s also very important that your base is sturdy and made of very heavy paper. Because regular 175gsm (65lb Cover) cardstock will not be the best option here. So I recommend for the base to use paper with a weight of 250 gsm and heavier (not lighter).
 6")
The base is ready, so let’s put it aside for now and proceed with petals.
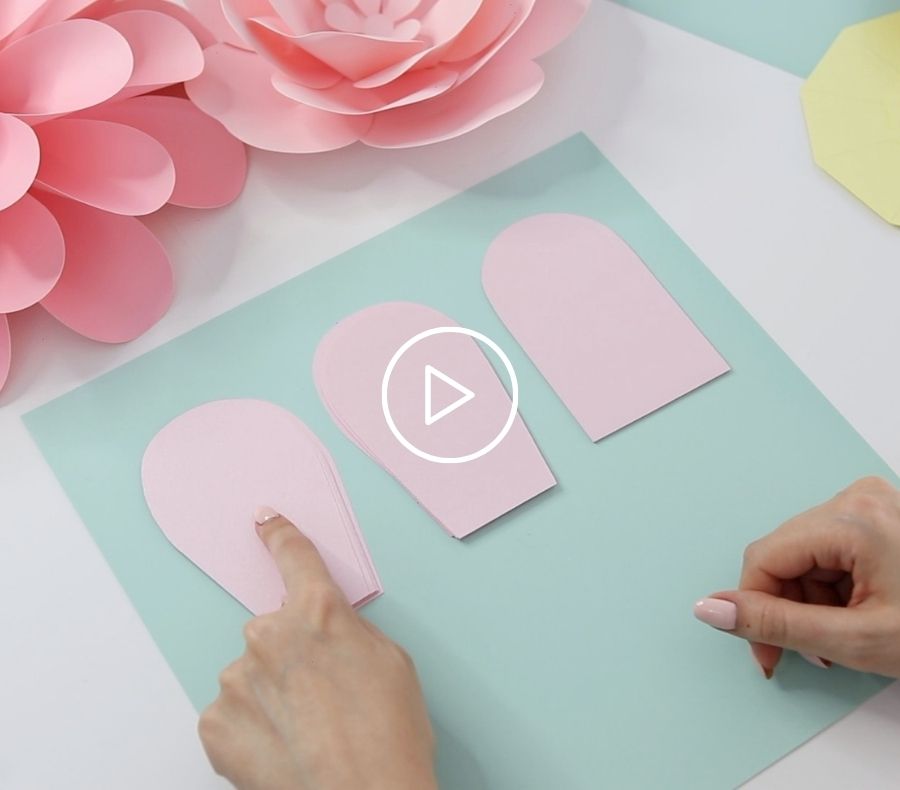
For one paper dahlia flower we need 10 petals №1, 10 petals №2, 6-7 petals №3, 4-5 petals №4 and 1-3 petals №5.
The number of petals is always different, because it depends on how much you fold up and glue every petal.
 7")
And here, it’s very important to pay attention to the paper weight too. Because, unlike for the base, the paper for the petals shouldn’t be too thick. But opposite, it should be very lightweight so it’s flexible and easy to work with. So ideally it will be120 gsm (80lb Text), but you can go up to 175gsm.
But I don’t recommend you to use heavier paper for the dahlia, because it will be very difficult for you to work with it. Unless you are making a really really big flower.
So, in order to fold the perfect petals and not make ugly creases on the paper, we need to prepare each petal first.
I’m working through the paper by curling the whole petal first, and then I also additionally curl the corners. In this way, I kind of soften the paper and pre-shaping the petal, so it’s easier for me to naturally fold the petal later.
 8")
And as usual, I curl petals using the edge of my desk, but, of course, you can do it any way you are more comfortable with. And like this I work through all my petals.
Now let’s start with the first 10 petals №1.
In order to fold an even and not skewed petal, we need to symmetrically fold its edges exactly in the center. And to do this, I hold the petal upside down, visually find the center point, and focusing on this center point, I symmetrically fold the corners.
 9")
Please note that I only fold the paper at the very bottom. Because this first row of petals should be as open as possible, so you don’t want to fold and close them too much.
Then once I like the way I fold my petal and how it looks, with just a drop of glue I secure it in place. And trust me, guys, using this method your petals will always be even, straight and symmetrical.
And everything the same with the petals №2 and №3, you keep folding only the lower part, but because of the different shape your petals will turn out to be slightly more closed.
 10")
I prepared all the petals number 1, 2, and 3, and the rest small petals number 4 and 5 I like to make later, because I want to see how much I will need to fold them, and I don’t like to make them in advance.
And I start to assemble the paper Dahlia by gluing the first row of 10 petals №1.
I glue each petal exactly in the middle of each section, using the small base as a stop-line.
 11")
First, I always try the petal on, and then I apply glue to the part where I see it will contact with the base. You can also very gently flatten the petal and press it down so that it sticks better. And when gluing, always make sure that the petal lies flat and does not skew to either side.
So, like this, carefully working and aligning each petal, I glue the entire row, and proceed to the second row of petals №2.
The petals of this row I will glue exactly between the petals of the previous row, making a step inside for about half an inch.
 12")
Look, I try the petal where I want to glue it first, and then I pencil mark those exact places where this petal will touch the petals of the previous row.
And then I apply glue to the 3 points – on the tip of the petal, and on the 2 marks I just made. Like this, I securely fix the petal.
 13")
I know this is very annoying and tedious process, but this is the only way to make the flower very neat and not to crease, bend, or crumple the petals.
In addition, using this method, we will fix the petals not only with their tips (it’s the most common scenario), but also at other anchor points. And this is very important because it will surely add rigidity and stability to the flower.
And be sure to try on each and every petal, because the contact points will always be in different places.
 14")
And this is how it looks from the inside. As you can see, the petals are firmly glued and fixed in place, and everything looks very neat.
The 3rd row will consist of 6 or 7 petals number 3, and, in fact, I always need a different amount.
So glue the petals the same way, placing them side-by-side, and making a step toward the center about half an inch again.
 15")
Now let’s make small petals. Here you will try to decide by yourself how much you want to fold them. Because the more you fold each petal, the more petals you will need for this row, and opposite, the more you open the petal, the less you will need.
I usually get about 3-5 petals for this 4th row.
 16")
First I try on the petal and see how high I would like to place it . And here I no longer need any marks, because I can clearly see where to apply the glue.
When the last petal remains, I will try it on and see how much I need to fold it so that it fits (sit) tightly into this row.
 17")
The last row of the smallest petals №5 left, and now I’m going to fold them quite a lot, because I have very little space left in the center, and I want to place three petals there. So I will fold and glue them one at a time.
 18")
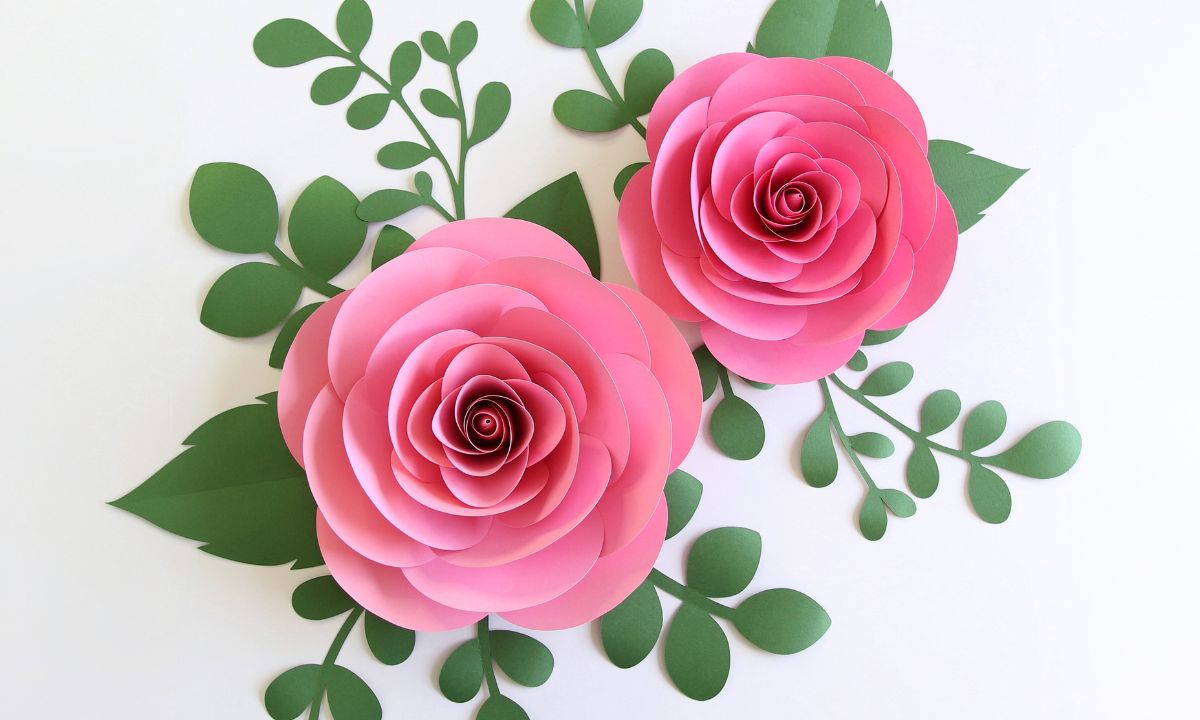
And here is the final result!
 19")
I hope that you will also try to make this paper dahlia flower with me. And make sure to get the free templates here👇🏼.
And if you want to go further and make the rest of the flowers from the composition, then be sure to check out my “Paper Flower Backdrop DIY Kit”.
 20")
I’m Oksana and I love paper flowers and all things paper. Here at FancyBloom I design new flower templates, make paper flower tutorials, and share my ideas and inspiration for fancy and modern craft.
Now check your inbox to get an email with the freebie inside.
I can’t wait for you to dive in!
If your email doesn’t arrive in a few minutes, don’t worry. Be sure to check the spam folder and promotions tab.
If you believe there’s a problem, write to [email protected] and I will take care of you as quickly as possible.

10 Responses
boa tarde
tudo bem?
efetuei a compra pois não consigo abrir de jeito nenhum da erro
I love your work your flowers are so beautiful 😍 I want to make a wall for my granddaughters room they are 6 year old n 1 year thank-you so much for sharing your gift❤️ with us.
Hi Marisol, you’re very very welcome! So glad it was helpful for you! And wish you good luck with your project💖!
Thank u so much oksana!
Love u from Indonesia ❤🤍
Ayu, thank you, dear💞!
I love the Dahlia, great tutorial. How big is the finished flower with the template you provide? thanks so much. Laura
Thank you so much, Laura🌸 The finished flower is about 13″ in diameter💋
I love the design of the Dahlia! I was excited to make it, however you do not tell what you are suppose to resize the petals to. Your template printed everything on 1 sheet of 12×12 paper. There is no way this is going to make ~13″ flower.
Hi Brenda! Thank you for contacting me with this issue! As a rule, my templates always have the original sizes.
But, unfortunately, some programs resize files for reasons unknown to me (especially Cricut Design Space).
In the SVG templates folder you can find a file called “Dahlia paper flower (original sizes)” where I wrote all the exact dimensions in case of distortion by your program, so you can manually adjust the sizes.
If you prefer to print templates for manual cutting, then the printer can distort the sizes too. For this case, in the folder with PDF templates there is a file “How to print PDF files – Read me!”, which contains instructions on how to properly set the printer settings.
If you have any further questions or need my help, please email me at [email protected] and I’ll be happy to help!