
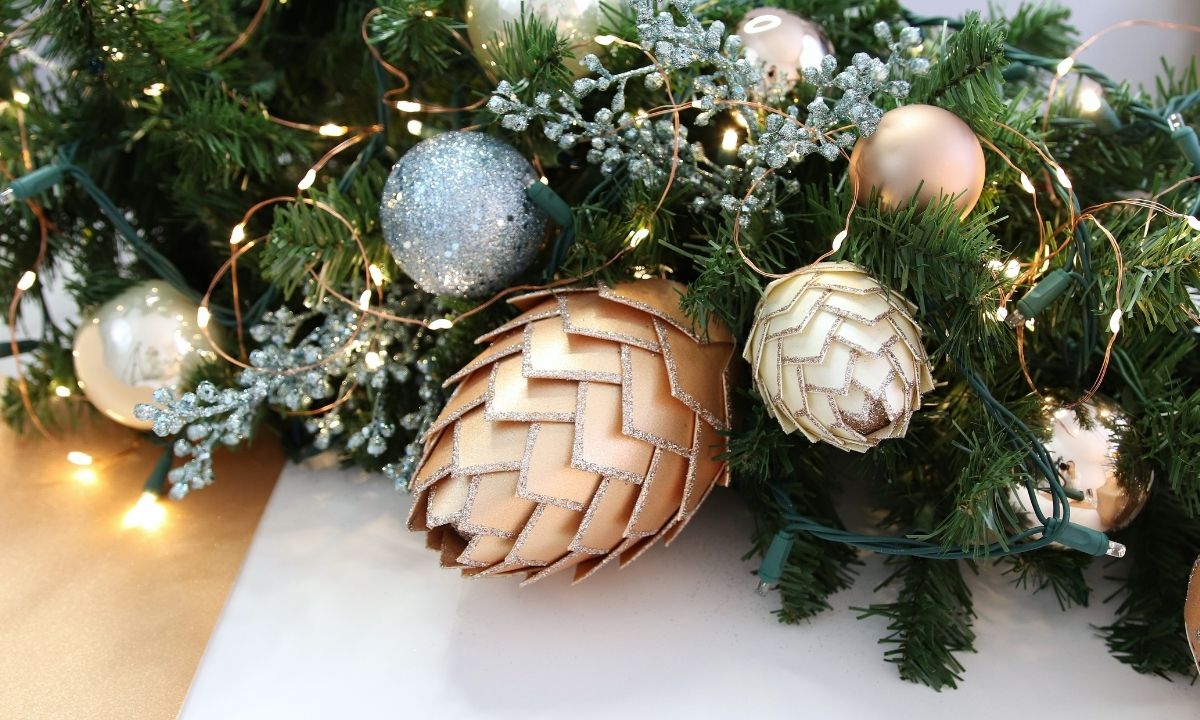
Agree that handcrafted Christmas ornaments are much more meaningful and special over the store-bought kind. So this year I decided to make large paper pine cones for my Christmas tree.
These pine cones turned out to be so gorgeous, magnificent, and festive that I thought I just have to share with you how I make them, and maybe inspire you to make your own diy paper pinecone ornament too.

My egg is 5.6 in long and 3.8 in wide, and this is the largest egg that you can find at your local craft store (like Michael’s or Hobby Lobby), but there are even bigger sizes available on Amazon.
I bought my diy ornaments at the Dollar store. They come in a set of 2 bubbles, so for $1 I had 2 caps. But I know that you can also find these caps separately (for example on Amazon), without balls.
It’s also good to have a sewing thimble. Especially if you will be making several pine cones or using thick paper, like me. It will save your fingers.
You will need a few small pieces of crepe paper or any other soft paper.
And of course you will need paper!
You can use any paper you like, for example cardstock foil (I think it will look so stunning and festive).
But the most important thing is that your paper should not be too thick, otherwise it’s very difficult to work with, and, also, the pins will probably not hold it in place.


Here’s the thing, although I advise you this, I myself did the opposite and used the thickest paper possible.
Since I was decorating my tree in a certain color palette, I wanted my pine cones to blend perfectly with the rest of the decor, so I needed a very specific paper color.
And, honestly, I didn’t have time to order online and wait for delivery, so I went to Michael’s and found this gorgeous, shimmery champagne color paper that matched my decor just perfectly.
This paper was way too thick, but I had no other options. I really wanted to use it because of the color, so I decided that I would do it no matter what.

My advice to you – use much thinner paper.
Ideally it should be 120 gsm, like the creme paper that I used to make my little pinecone. And I think that you can go up to 160 gsm.
If you use thicker paper, you will not only have to pin it, but additionally secure it with glue, as I did. So it will be an extra step and extra work for you.
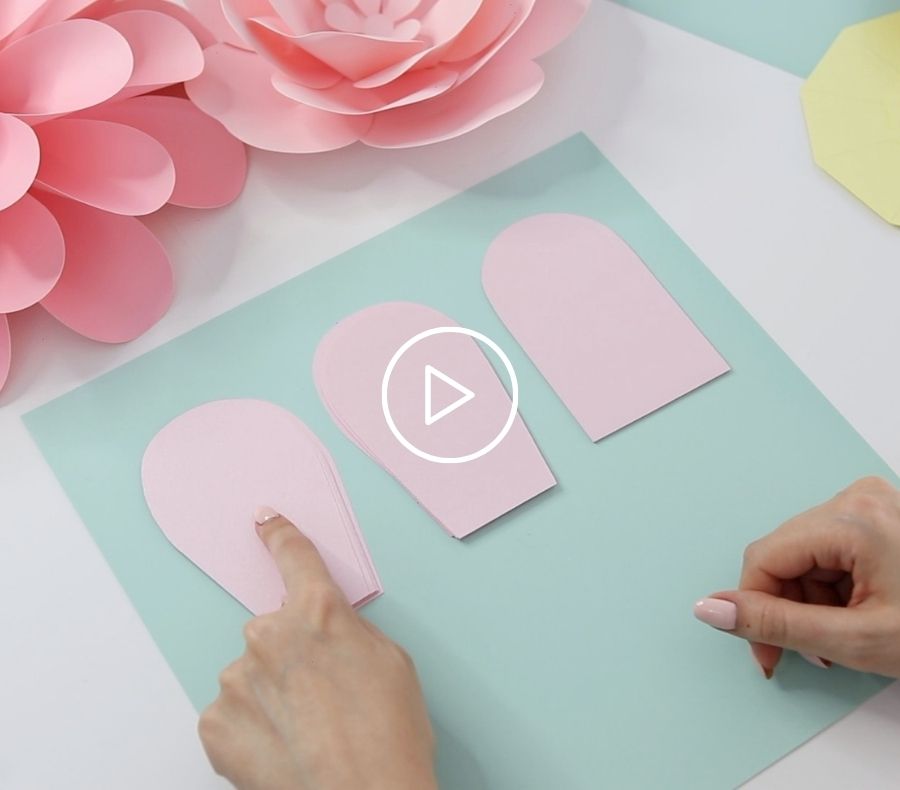
First we need to cut paper squares of size 2.5 inch. You can make your squares smaller, for example 2 in, but I personally prefer larger scales. Because when the scales are small and there are a lot of them, it reminds me more of a fish, and not a pine cone.
From one 12×12″ sheet of paper, you will get 16 squares, and from a standard 8.5 x11″ sheet, you’ll get 12 squares.
On average, in my experience, it takes about 50 squares per pinecone. So consider that you will need about 4 regular 8.5×11 sheets or 3 sheets of 12×12 inches.

I mark out and line my paper with a pencil and a ruler, and then cut it into squares with scissors.
You can also use a paper trimmer if you have one. It will be much easier and will save you some time. But I didn’t have it, so I did it with a pencil and a ruler.
The next step is to fold the squares. I use a ruler and my gridded cutting mat to fold them straight and not skew.
You can also mark the middle point with a pencil first, and then fold it.

I advise you to take your time and don’t do it just by eye, because if your scales are skewed, it’s much more difficult to assemble the pine cone.
So we need them to be nice and straight.
3.1 Glue the top and bottom of the foam base with paper
Before gluing the glitter or the cap, we need to glue these places over (top and the bottom) with paper.
In general, it’s always better not to glue anything directly onto the foam, because remember that hot glue melts the foam.
So I am using crepe paper for this. If you don’t have crepe paper, you can use, for example, tissue paper, paper towel, or any other soft paper that you will find.

First I stretch the paper well (because I need as few wrinkles as possible), and then cut out the circles. They don’t have to be perfect so I do everything by eye.
And then very carefully I glue them over.
3.2 Glue the ornament cap to the base bottom
Then glue the ornament cap. Put some glue on both wire ends and glue it into the foam.
Try to find the right place and glue the cap exactly in the center. This is important because you don’t want your pinecone to be skewed, so be precise and pay attention to this.

And then, in addition, I always make sure to glue the joint around the cap with a good amount of glue, to secure it really well.
I use a regular plastic cup as a stand, so while the glue dries on the bottom, I sit the egg in a cup.
3.3 Cover the top of the base with glitter
Next I cover the top part with a pretty thick layer of regular clear glue (not hot glue) first, and then I cover it generously with glitter.
And look how pretty it looks!

The good news is that we don’t have to wait for the glitter and glue to dry because we won’t touch it anyway.
So I can start to assemble the pinecone.
The first row should consist of 4 scales.
I pin the first scale, then the second scale opposite the first, and then third and fourth remaining scales on the sides. This way you can place them more evenly than if you did it in a circle order.
Try to not skew the scales and make this first row very neat.
Look for the horizontal line. It’s very important to start the leveled first row, so that later your pinecone comes out even and not skewed.

If you will use the right weight paper (like 120 grams, as advised you), then you will not need to glue anything, because the pins will hold the paper perfectly.
But in my case, the paper was too thick and heavy, so I had to additionally glue paper and pins in several places to keep them in place.

Every next row I step down a little less than an inch, and I would not advise you to step less than that. Because if you place the scales too frequently, as I told you already, they will look more like fish scales. So I hope it makes sense.
Always look for a horizontal line, and follow that all the scales are exactly parallel to the base of the pine cone.
It often happens that the pins do not want to go inside and bend. This usually happens if you do it too quickly and press too hard. So don’t be rushed and insert the pins slowly. Then, even using thick paper like mine, your pins won’t bend.

Starting from about 4-5 rows, the paper begins to stick out more and more on the bottom part, because we have a round base.
But we need the paper to follow the shape of the base as much as possible and to cover it as tightly as possible.
So I start to kind of pinch the paper in the middle of the scales to repeat the round shape of the base, and then I fix this pinch with a pin.
And like this I continue to pin and glue all the remaining scales.

Next I want to cover all the gaps between the paper and the base, so I fill this joint line with hot glue.

And then I cover the entire bottom part with hot glue to even out the surface.
Once the hot glue has hardened, I can start decorating my pinecone. And I want to decorate the edges of the scales with glitter.
You will need any transparent glue. Please note that hot glue will not work for this, because it hardens too quickly.
I will apply the glue with a brush to the very edges of my scales.

The most important thing here is that the strip of glue should be very thin, but the layer of glue should be thick.
From my own experience I can say that if this strip is too wide, it will not look as chic and polished as when the strip is slimline.
And if your layer of glue is not thick enough, the glitter will not adhere well, which also will not look good.
So you have to meet both of these conditions – a thin line, but a thick layer! I hope it makes sense.
So take your time and get it done very neatly.

When I apply the glue, I generously sprinkle it with glitter.
And speaking of glitter, I like to pay your attention that I am using a very fine glitter. Because I’ve tried using larger glitter, and it doesn’t look as pretty as this extra fine one.
If I see that I have messed up with glue somewhere, I can easily clean it, because the glue remains wet for a very long time until it completely dries.
So like this, working row by row, I carefully apply glue and glitter to all the scales of my pine cone.

And the last thing left to do is to apply glitter to the bottom of the pinecone.
The same thing here, I apply a pretty thick layer of glue, and then cover it with glitter.
Be careful not to touch the edges of the scales as they are still damp. If you doubt yourself that you can do this neatly, it is better to wait until the glue on the scales dries, and then make the bottom part.

My pine cone is ready and I carefully put it in a plastic cup so that it dries very well.
The next day, when the glue is completely dry, you just need to take a dry brush, and brush off excess glitter and clean the pine cone.
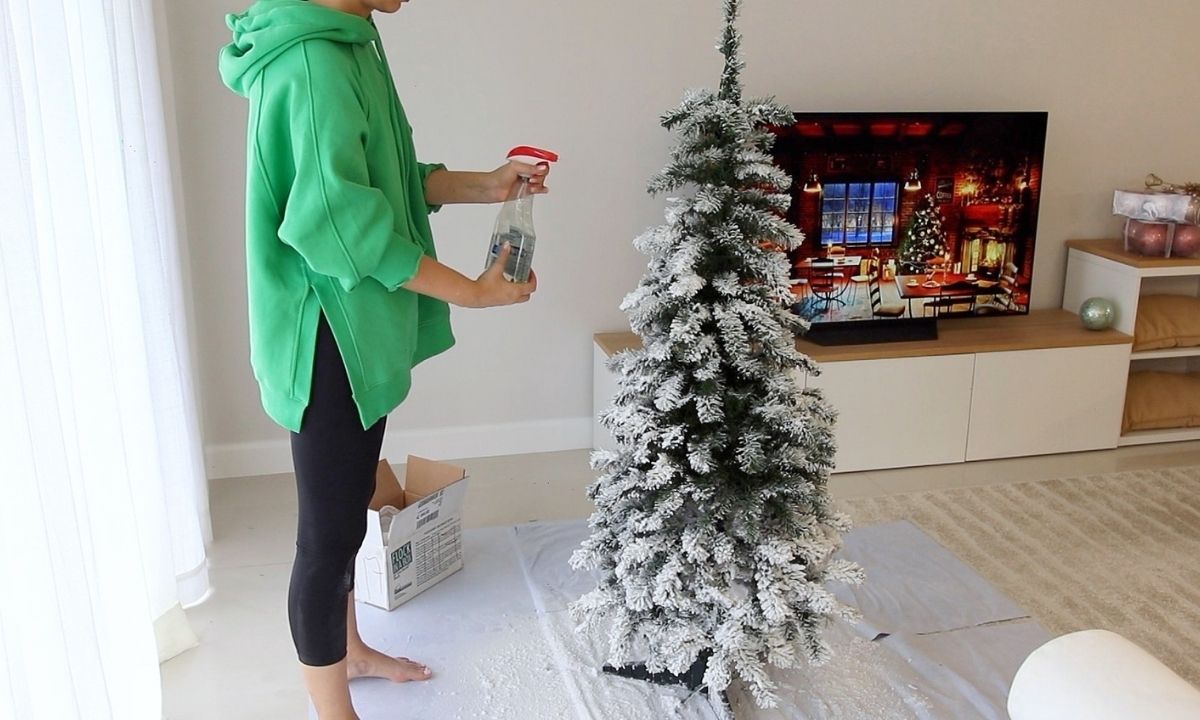
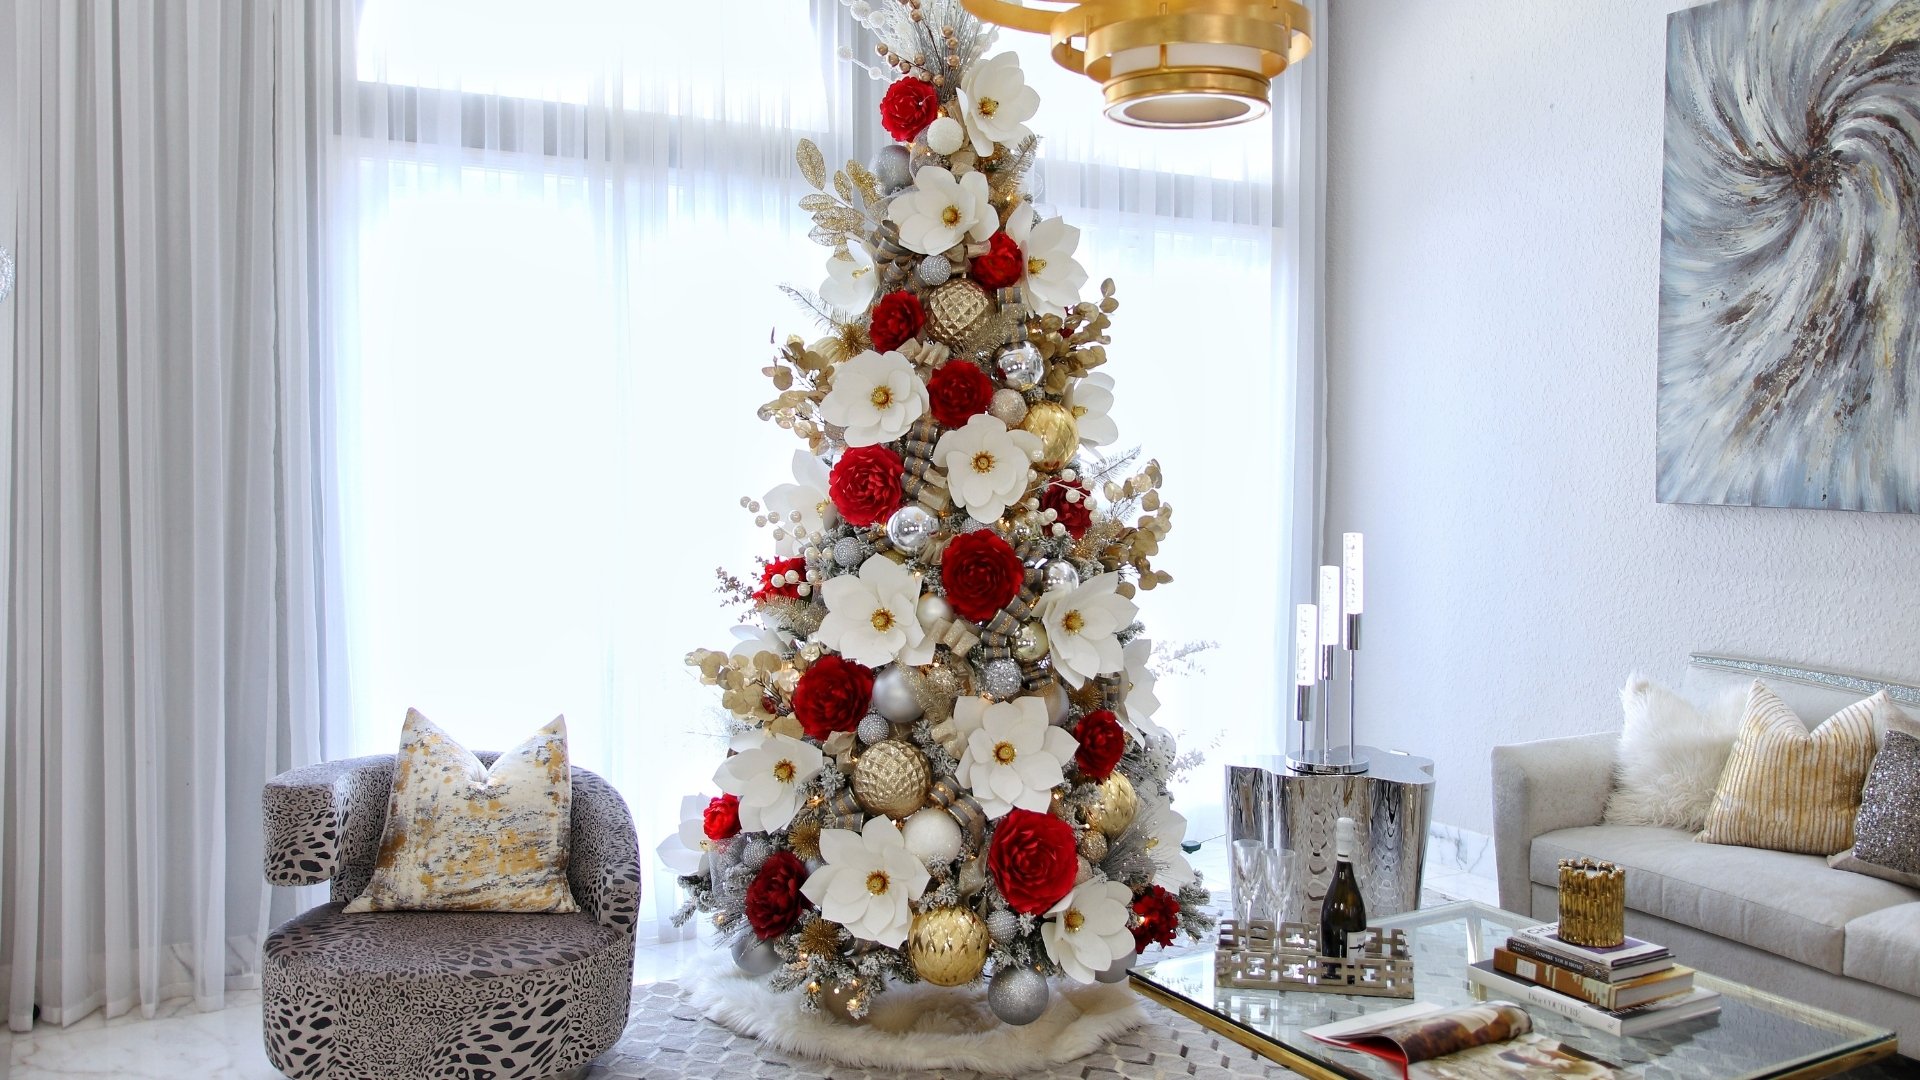
Also be sure to check out how I decorated my Christmas tree with these pine cones!
In a separate blog post, I shared the entire process of decorating and transforming my cheap Christmas tree into a glamorous one step-by-step.

Have you ever tried making paper pine cones? Would you hang ornaments like these on your Christmas tree?
Let me know in the comments! ⤵️
Disclaimer: product links may include affiliate links.
I’m Oksana and I love paper flowers and all things paper. Here at FancyBloom I design new flower templates, make paper flower tutorials, and share my ideas and inspiration for fancy and modern craft.