This site contains affiliate links, view the disclosure for more information
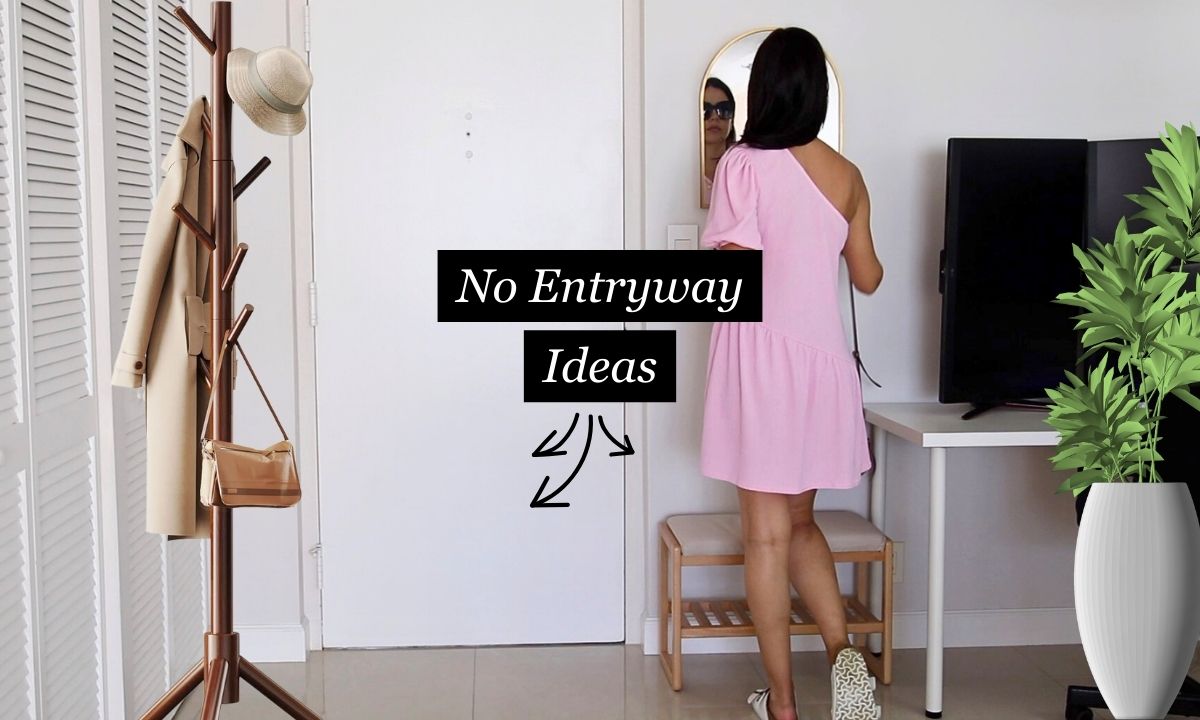
I live in an apartment in South Florida. And one thing I’ve noticed is that most places here don’t have any entryway spaces.
When you walk in, there’s no designated entryway or foyer, and as soon as you step inside, you find yourself right in the living room.
I understand that this is due to the weather and not having to deal with heavy coats and bulky outerwear. But still, I would really like to have a designated place where I can leave my keys, hang up my jacket, or just sit down and comfortably put on my sneakers.
So, I’m excited to share with you how I managed to create a fully functional and at the same time stylish (in my opinion) entryway from a narrow piece of wall measuring only 23 inches wide!
Let’s explore how to create a foyer in an open living room.
Alright, let’s start by taking a look at the entrance area and seeing how it looked before I finally admitted it needed some serious attention.
The old Ikea table was placed here when we first moved in.
But, you know, there’s nothing more permanent than the temporary, so it quickly became a magnet for all the clutter and random stuff we brought into the house. It was always a complete mess.

On one side of the front door, there are two closets and no wall space at all. Also, the first closet has an AC unit, so we can’t really use it.
On the other side of the door is a small nook where my husband has set up his office. And I can’t move his desk any further from the door because it’s already snug against the wall.
So the only space I had left to work with was a narrow piece of wall, and I can say I made the most out of it!

The first step was to determine the functionality that I needed from this foyer, so I made a list of all the essentials I wanted to have.

Now, I know, you might be thinking right now that my wishlist sounds a bit ambitious, like I want the whole shebang right at my front door. But guess what? I managed to fit it all in!
And I started, of course, by giving the area a good cleaning. Finally, it was time to say goodbye to the cluttered table and just get it out of there.
I tried to remove all those black marks and smudges from the wall and door with magic eraser (it’s a powerful little thing!).

But be careful because it can also wash off the paint too if you’re not careful, so make sure to use it with a gentle touch. I’m sure you already know about it, just a friendly reminder ;-).
By the way, I forgot to mention that I’m in a rental apartment, so obviously, I can’t make any renovations or replace that old door and locks. So everything I did here was focused on renter-friendly solutions.
Before diving into the search for all the items, I made sure to measure everything to understand the sizes of the things I needed to look for.

Obviously, I wouldn’t be able to find separate places for both the seating area and the shoe rack, so I looked for a bench with built-in shoe storage to combine both functionalities into one piece of furniture.
Then, I found a mirror and measured how high I wanted to hang it.
And for keys and glasses, I decided to use a shelf.

After I marked the mirror placement, I was able to determine the optimal height for hanging a shelf. But then I ran into a bit of a problem – where to place the hooks, the final item on my wishlist.
If I attached the hooks under the shelf, there wouldn’t be enough room to hang items unless they were resting on the bench, creating a messy and unattractive look.
I didn’t want to mount the shelf higher either because it would be too high and uncomfortable for me, and it would also be too close to the mirror, which I didn’t really like. And I didn’t have any room for hooks on the sides.

Please note that there is a light switch on one side, so I needed to step away from it at least a little.
I had the option of giving up on the hooks altogether, but I decided that even having just one hook would be really useful for me.
So the only option left was to place one hook on the same level as the shelf. And this led me on a quest to find a very narrow and small shelf that would fit seamlessly into this limited space.
Alright, the next step was upgrading that old light switch to a new and modern one. Because, guys, can we talk about those outdated switch plates and outlets? I mean, seriously, it’s 2023 and we’re still stuck with these eyesores even in brand-new houses!
Honestly, I just don’t understand why there aren’t more stylish options available in regular hardware stores. It seems like they keep selling the same old designs that haven’t changed for decades.

Of course, I couldn’t go around changing all the switch plates in the entire apartment, but this particular one really bothered me because it’s located in the most visible place (and my inner perfectionist simply wouldn’t let me live in peace knowing that my new entryway vibe would be ruined by this ugly, yellowish switch).
if you decide to change the switch panel yourself, always remember to turn off the power in the electrical panel before starting any work.
I feel pretty comfortable doing it, as I’ve done it many times, including changing sockets and light fixtures. But if you’ve never done this before, be very careful, and even better, call an electrician.
I found this really nice switch panel on Amazon, installed it, and boy, did it make a difference! It instantly gave this area a mini facelift with a sleek and modern touch.
I’m really glad I took this extra step because the details matter!


Next was to hang a mirror. I found this cute little arched mirror, but I didn’t quite like the color of the frame.
Since it was made of plastic, it looked a little bit too bright and shiny for my taste, and also it had a touch of red undertone. But I wanted something more like an aged, matte bronze finish.

I have a large mirror in my living room, which I painted in bronze color myself. So I decided to do the same for this little mirror to create a cohesive look and ensure they match.
I painted it using Rub N Buff (if you don’t know it’s a metal finish wax), I’m sure you’re already familiar with this product. And I used it in my favorite color, Golden Leaf.

I used cosmetic sponges from a Dollar store for application.
I tried different ways to apply this wax – with a finger, a brush, a piece of cloth, but I like the sponge the most, as it gives the most even application.

Since this mirror is very light, I decided not to make two holes in the wall, but to make just one and use picture hanging wire.

And just like that, the mirror finally found its perfect place on the wall.

Next up was the shelf. And I think I found the narrowest shelf because it’s just 12 inches wide.
It has the picture ledge which I really wanted to prevent things from falling, and also this shelf is made from solid wood, so I’m pretty happy with my find.
The only downside was that I couldn’t manage to fit it snugly against the wall. It had very weird holes and screws, so I even ended up replacing the screws with my own (not a big deal, but still).

I always use masking tape to help myself. So I marked all the holes on the shelf first, and then simply transferred the tape with the markings onto the wall.
This trick makes it easy to hang anything and always ensures a perfect fit.
Then I installed the hook.
I made sure to find a hook made from the same material and in the same color as the shelf, so they would look like a perfect match. And I believe I found a good deal!
These hooks are of good quality, super affordable, and they mount tightly to the wall without any issues. So I can definitely recommend them!

And last but certainly not least, I added a cute bench that I found on Amazon, completing my entryway setup.

What I really liked about this bench is that it came fully assembled. Plus, the cushion cover is removable, which means I can easily toss it in the wash if it gets dirty. And of course I liked its modern look!
To prevent the mirror from constantly shifting whenever the door slams (since it’s quite lightweight), I used some regular sticky tack.

Let me tell you, this little thing has saved me on multiple occasions. So I highly recommend keeping some handy in your household. I just love this stuff!

As a final touch, I added a tiny vase with my paper palm leaf for a little decoration.

Sources: 1. White porcelain bud vase (set of 3) 2. Fan paper palm leaf template
And if I could, I’d also add a stylish doormat, but unfortunately the gap between the floor and the door is just so tiny that if I were to put a doormat there, the door wouldn’t be able to open.

So there you have it, my entryway project is complete!
I know that calling it an “entryway” might sound a bit grandiose given its size. But what matters most is that it’s doing exactly what I wanted it to do: it’s functional, practical, and meets all of the requirements I had in mind.

I hope you enjoyed this post, and I hope it gave you some ideas on how to make the most of your own space!
What are your go-to tips for styling and organizing your entryway? Share your thoughts and ideas in the comments below👇.
This post was all about how to create a foyer in an open living room.

I’m Oksana and I love paper flowers and all things paper. Here at FancyBloom I design new flower templates, make paper flower tutorials, and share my ideas and inspiration for fancy and modern craft.