

This site contains affiliate links, view the disclosure for more information
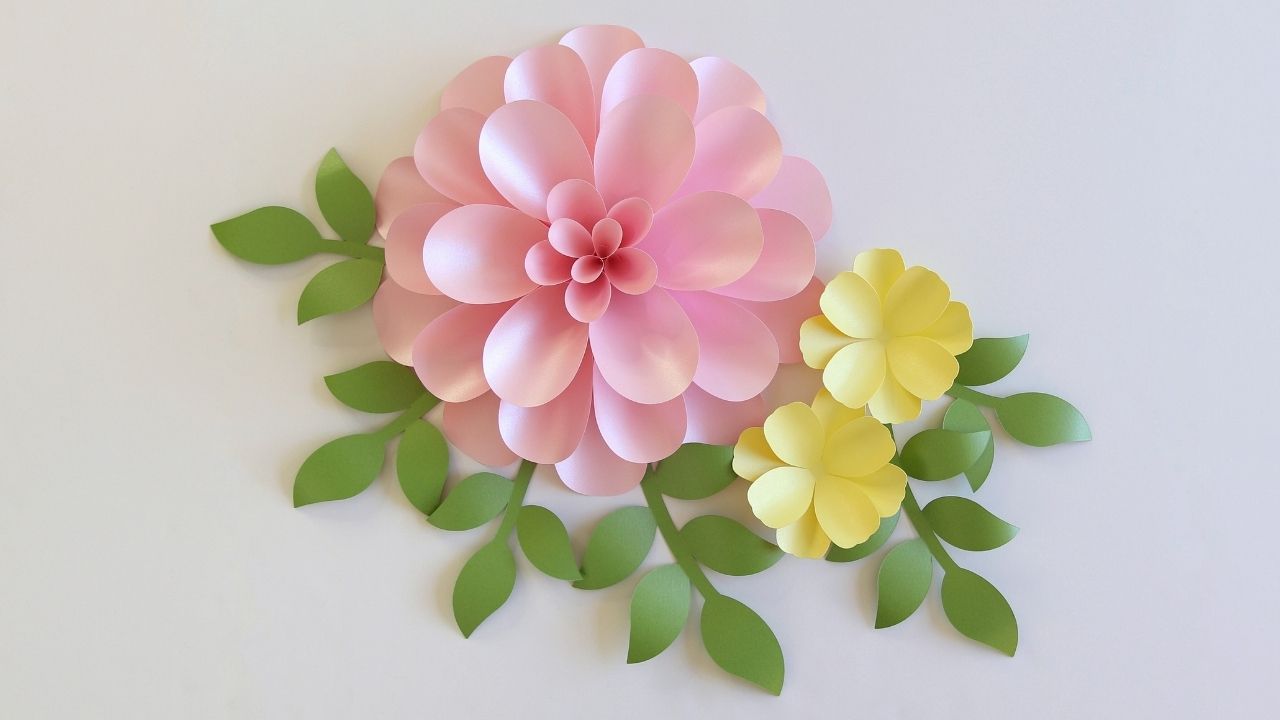
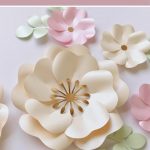
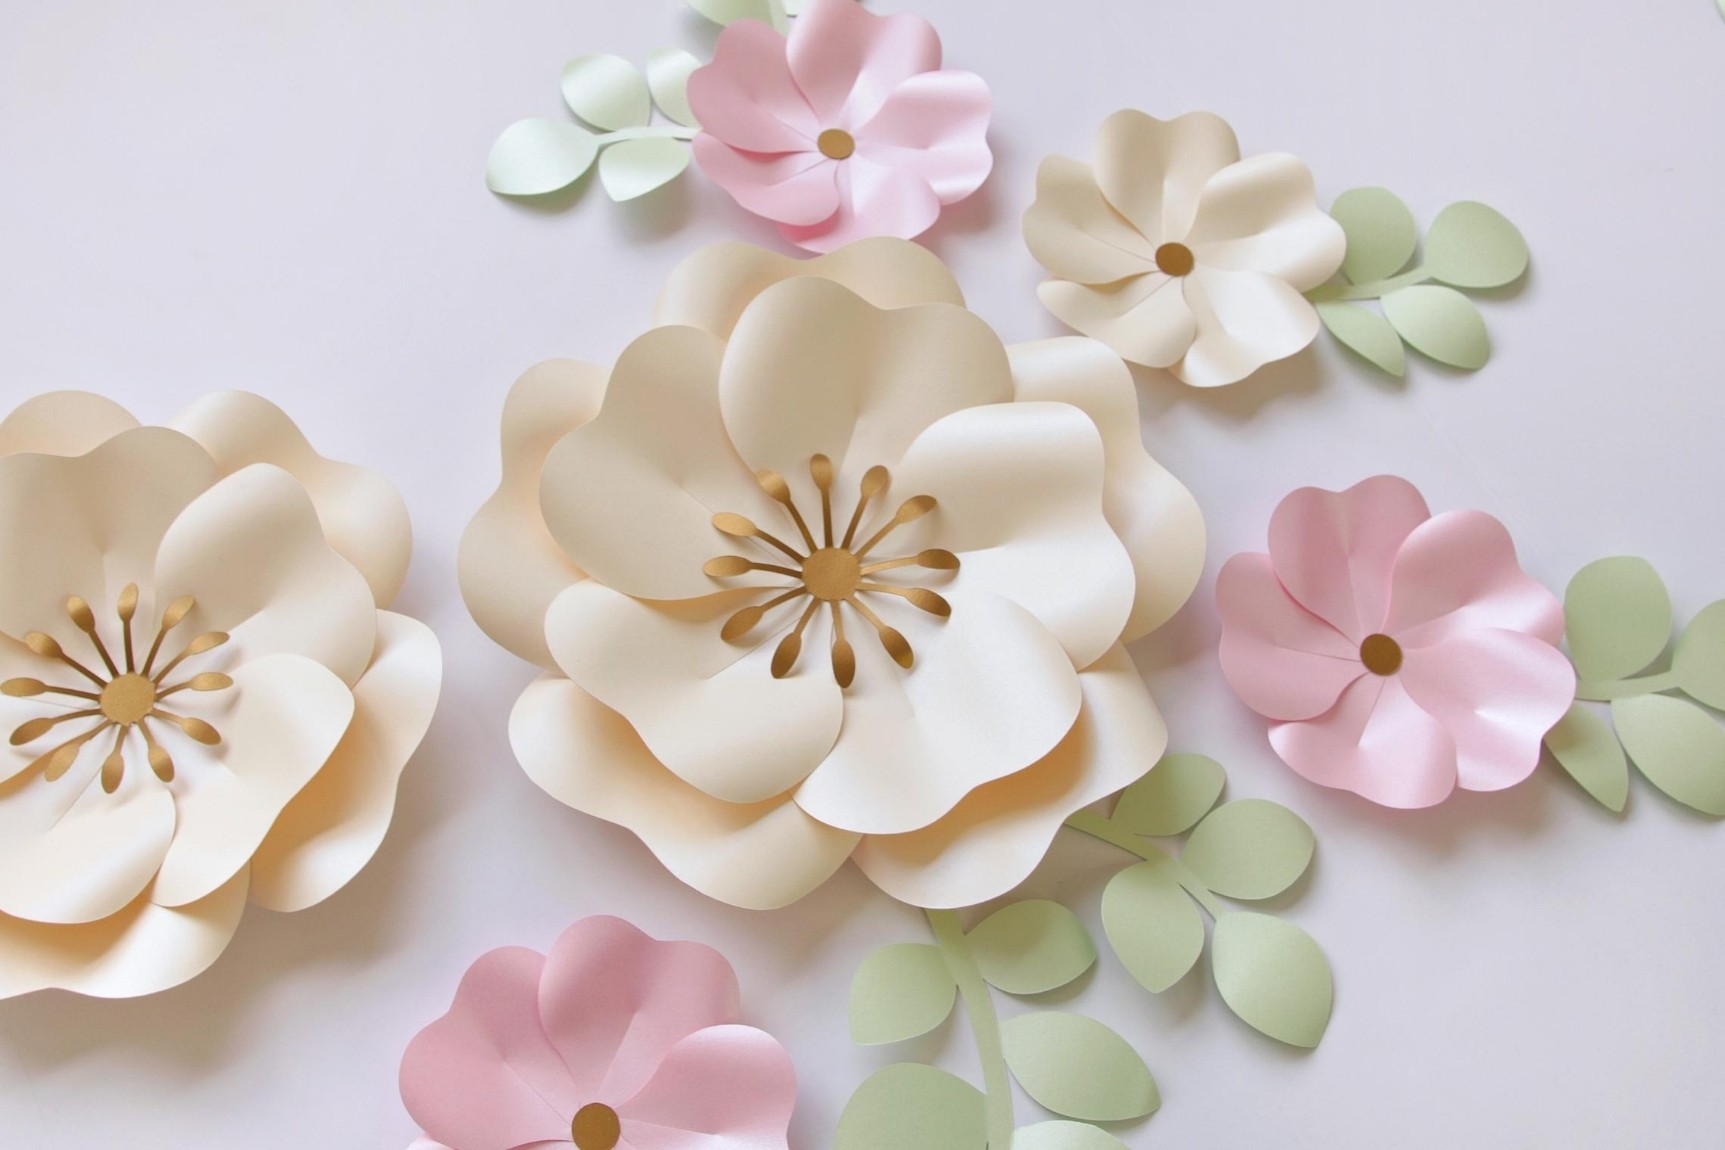
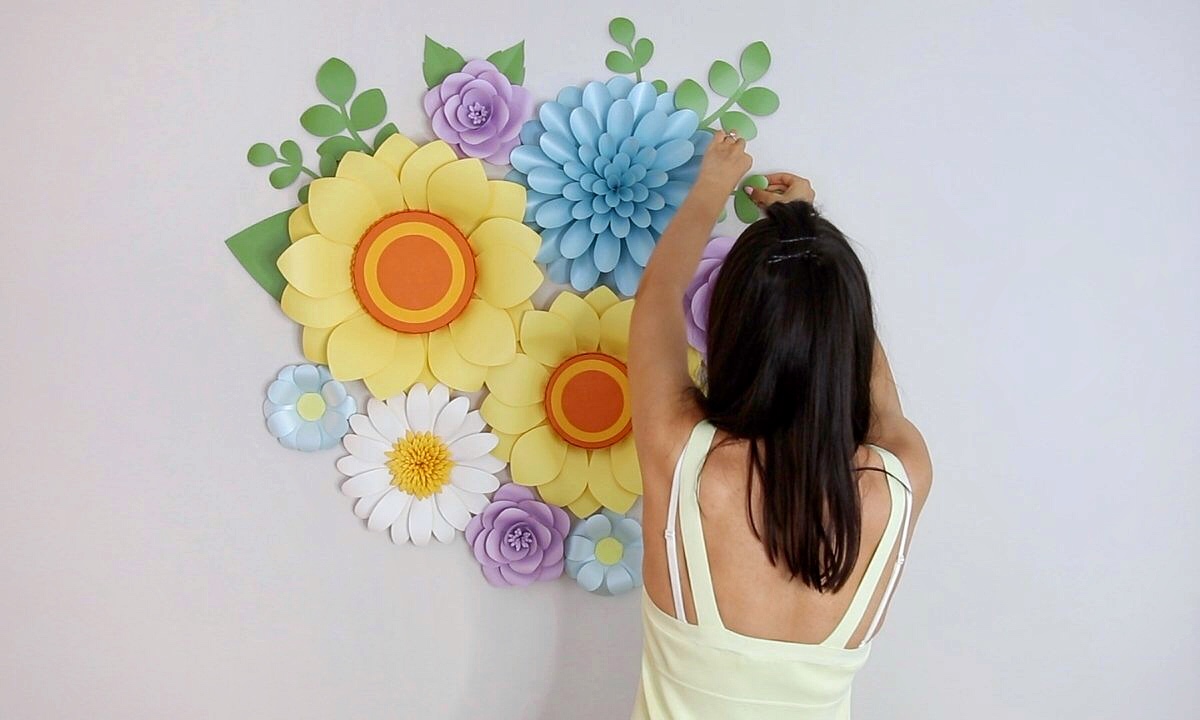
This simple but extremely cute flower can perfectly complement any paper flower composition and even become the main flower of the whole backdrop. It looks so elegant and lovely, and it’s also very easy and quick to make.
And the best part is that, along with this paper flower tutorial, I have prepared free templates for you!
So, if you want to see how I make it, let’s start the paper flower tutorial!
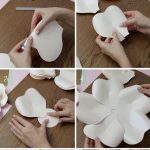
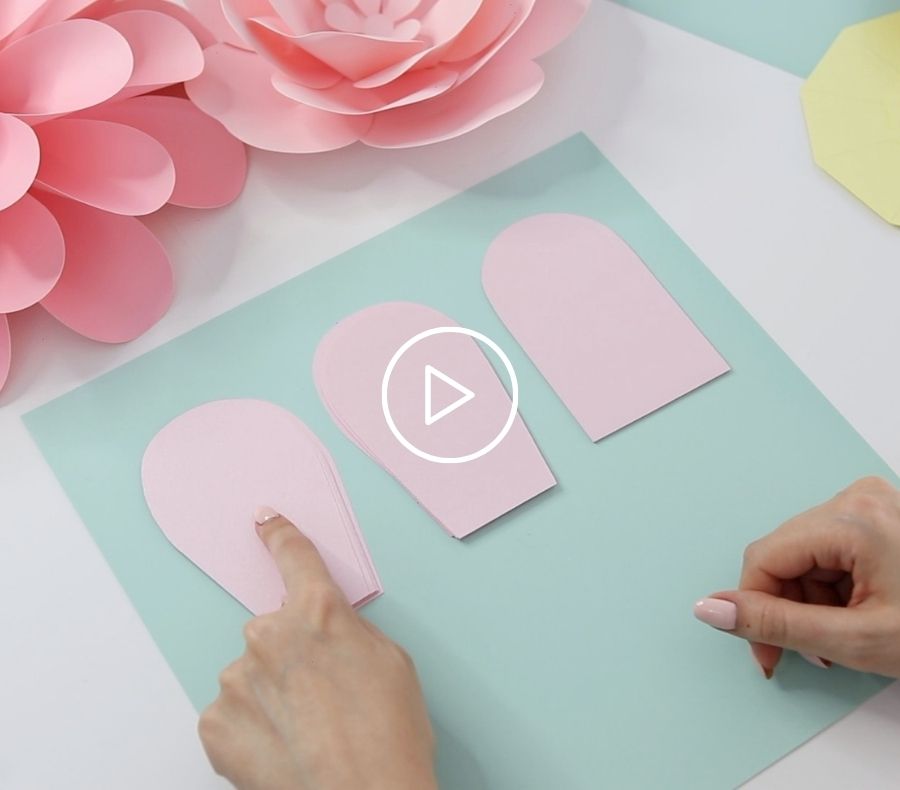
First, prepare the petals by cutting them out.
I use a cutting machine, but you can also cut everything by hand with regular scissors. This will be easy enough because these petals have very simple shapes.
If you cut by hand, use sharp scissors and try to cut very smoothly so the edges of the petals are clean and neat. Remember, these small details affect the appearance of the whole flower.

Sources: 1. Brother ScanNCut cutting machine 2. Tailor scissors 3. Cream shimmer cardstock (250 gsm)

For this particular flower, it’s better to use thicker paper because the flower is quite large and has few petals. Therefore, we need the petals to be sturdy and not flimsy. I recommend using cardstock paper with a weight of 80 lb Cover or more.
We only need 5 petals #1 and 5 petals #2. And you will also cut out the center piece and 2 bases that are included in the template:

Next, we need to curl our petals.
My students already know that I prefer to do this by pressing and pulling the paper against the edge of my table, but you can do it however you like.
Some artists prefer using a bone folder, while others use a glue stick, round pen, or marker to curl the petals. It really depends on what is most comfortable for you.

Once you curl the petals, let’s glue them to give them dimension.
For this paper flower tutorial, I’ve ensured that the templates are handy and easy to use. So there is a dashed line mark on each petal that shows how much to overlap and where to apply the glue.

And that’s how I prepare all my petals.

Okay, I’ve prepared all my petals, so let’s start assembling the flower.
I begin with a round base. You’ll notice that I’ve marked a pentagon in the center with a dashed line to guide you in gluing the petals evenly and at the right distance.


Always remember, the first petal in the round should not be glued along the entire edge, as the last petal needs to go under the first one.
But starting from the second petal, glue them along the entire edge as usual.

Once the first round is complete, let’s glue the second round separately.


After both rounds are ready, I like to position them to see how they should be glued together.

Typically, each subsequent round of petals is glued between the petals of the previous round in a staggered pattern. However, since these petals have a wavy shape, if aligned directly, the waves of the second-row petals would match the gaps between the first-row petals. So I prefer to rotate the second row slightly to cover these gaps.
Try and see what looks best, and then glue them in place.

Now, it’s time to add the center.
A common mistake I see from other people is cutting out the center and gluing it as-is, without any additional shaping. By simply shaping the center a bit, you can enhance its appearance significantly!

So I like to curl the stamens slightly outward and then gently bend them inward for a more polished look.
I think this is a really pretty flower with beautiful, smooth lines and shapes. I hope you’ll give it a try using my templates and paper flower tutorial.
If you enjoyed making simple large paper flower, you’ll love my other tutorial where I guide you step-by-step how to create a beautiful paper rose. Click here to access the free templates and start crafting now!


I’m Oksana and I love paper flowers and all things paper. Here at FancyBloom I design new flower templates, make paper flower tutorials, and share my ideas and inspiration for fancy and modern craft.
22 Responses
Love your flower tutorial! I can’t seem to download it. When I click on the pink button and fill out my info, I get an error message. I’m even clicking on the disclaimer about the digital download being for personal use. Is there something on your end you can do to fix this error? I would love to make these flowers for my daughter’s birthday party.
Hi Connie! Thanks so much – I’m so glad you enjoyed the video! 😊
For the exact petal sizes I used, please take a look at the file in the SVG folder titled “Large paper flower (original sizes)”. I included it to make sure you have the correct dimensions in case your program resizes anything during import.
This tutorial and template are so wonderful to work with! Thank you so much, I love it and I thank you so very much.
Thank you so much Janine❤️!
I have been decorating my library with flowers and these were the best to make! Do you have a template for the leaves as well?
Thank you Kerry!💖
Hi I wanted to do the white large flower but it’s not showing up where can I find that one
Hi Kaye,
If I understood your question correctly, you can download the template for this flower by clicking the “download right here” link highlighted in pink at the very beginning of this blog post. There is also a download button at the end of the post. Once you register your email, you will automatically receive the templates.
These are amazing wall paper flowers thabk you for all these nice ideas how do I get a free template?
Hi Ruth, thank you very much! Link to the free template right at the beginning of this post!
Oksana,
Thank you for doing such a great job explaining all you’re tips, tricks and the demonstration of how-to make those gorgeous paper flowers. You’re editorials are easy to follow and the outcome is always fantastic.
Truly,
Rachel
Rachel, thank you so much!❤️ Your words mean a lot!
Hello,
Thank you, it was easy to follow your tutorial and pattern. I made mistake but second time was a charm. It’s very pretty and I can’t wait to
teach my daughter. We will be using it for my daughter’s graduation.
Thank you!
Hi jen! Thank you so much for your feedback!💖🙏🏼
Hi Brenda! If you’re using a cutting machine, you can resize the SVG templates in your program to your liking by simply using the resize by scale function (just enlarge or reduce all parts by the same percentage). I hope this helps💕
감시해요 덕분에 예쁜 꽃을 만들어 볼 수 있는 기회가 생겼어요. 잘 사용할게요
I love these! So beautiful!
Thank you Teri!💕
Thank you Beverly! I hope you will enjoy making it!💖
Dear Annabelle, I’m so happy you appreciate it🌸 Thank you so much for these kind words🥰!
Thank you, Ana💕! In the SVG templates folder you can find a separate file called “Large paper flower (original sizes)”, where I wrote all the sizes of all the petals and other parts. If I didn’t fully understand your question – please let me know by sending an email to [email protected], I’ll be happy to help.
You’re so welcome, Beverly! Thanks for sharing🌸💋